How To Actually Make Windows 11 Good
On the numbers alone, Windows 11 has been a disaster. It took Windows 11 four years to overtake Windows 10, just 3 months before the predecessor's end-of-life. Adoption happened essentially under duress, and even with Microsoft's big push to update users' hardware (or throw it away if it doesn't meet new arbitrary hardware requirements) a full 25% of Windows users aren't upgrading. At the Windows 10 end-of-life deadline, Windows 7 tripled its market share in a single month.
Windows 11 rolled out as a bloated mess. It took away features including UX customization and control over OS updates while removing tried-and-true parts of the OS like the right-click context menu in Explorer in favor of pared down "modern" replacements. It's gotten so bad that many (including myself) feel that Windows has become actively hostile to our productivity. Microsoft stuffed it with telemetry, bloat, ads, and aggressive "features" designed to monetize your attention. The Start menu is 30% news feed you didn't ask for. Updates reboot your machine mid-project without asking permission. The default state is basically: "We own this operating system, not you."
All of that was before, well, this:
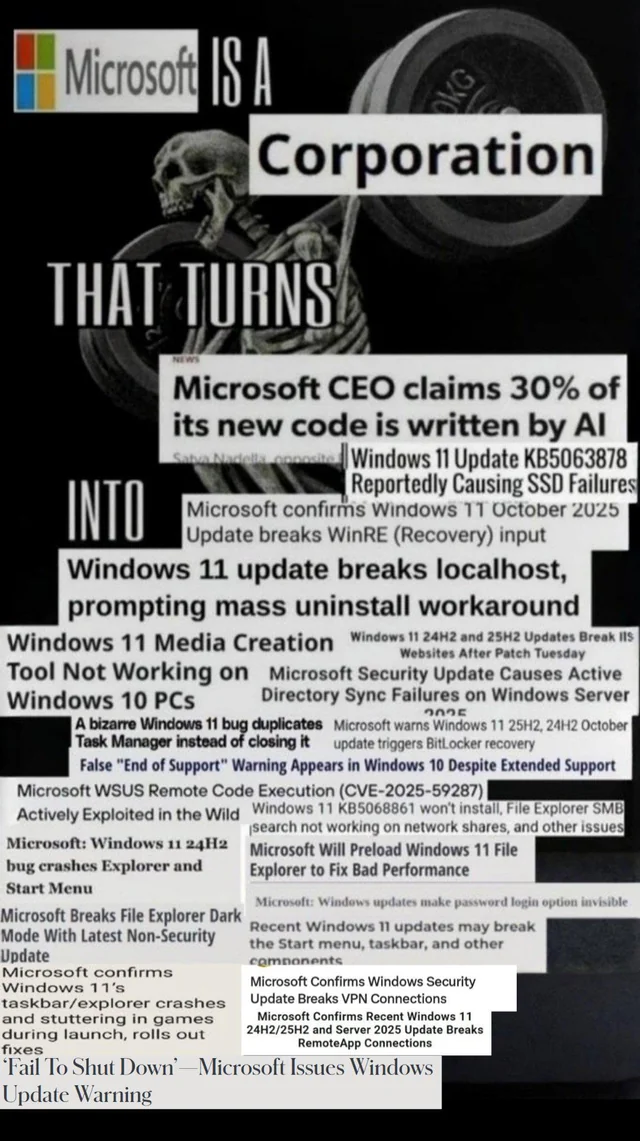
Microsoft's rollout of Copilot, it's double-down on Copilot, and its triple-down on Copilot, have garnered it the well-earned nickname 'Microslop.'
But underneath the slop is still a genuinely useful and usable operating system. Windows 11, when properly configured, is an excellent for digital independents. The magic is still there. It's just been buried under years of corporate decisions that treat users as products and metrics rather than people.
This guide will show you how to excavate it. After about an hour of work and a five-dollar investment, you'll have a Windows installation that's faster, cleaner, more respectful of your time and attention, and actually pleasant to use every single day. Your machine will feel like it's yours again. You might even enjoy using Windows again.
(Optional) Start From Scratch
Before you do anything else, consider starting fresh. If you want to escape the modern AI hell that is Windows, you can install from an older disc image, like Windows 11 23H2. If you want to continue receiving security updates, however, the older version you can install at the time of this writing is 24H2.
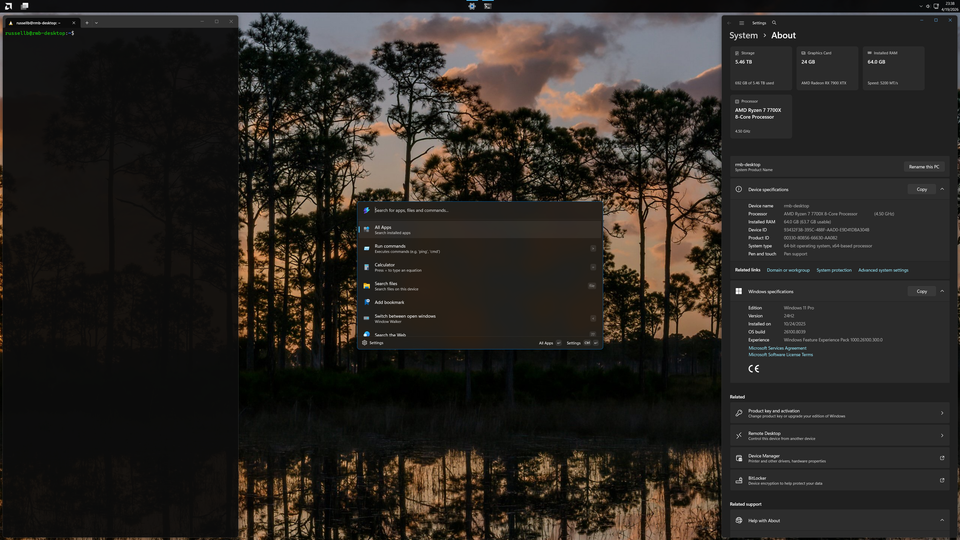
I am personally on 24H2 and, after a lot of finessing, I have tamed the OS to my standards. My OS never advertises to me, delivers me content I didn't ask for, or breaks ancient tried-and-true apps like notepad. Anything newer has far more aggressive Copilot integration and telemetry scaffolding. You can still debloat these versions, but 24H2 gives you a better starting line. It's supported until October 2026, more than enough time to pick a new targeted release to move to when you can be sure that version is usable.
Of course, Microsoft's Media Creation Tool only offers the latest version. You can't download 24H2 directly from them anymore. This is intentional. But Rufus, the excellent free USB bootable media tool, lets you install older Windows versions. Download Rufus, plug in a USB drive, select your Windows 11 ISO and twenty minutes later, you have your installation media ready.
Actually performing the install is straightforward. Boot from your USB drive (usually F12 or Delete during startup, depending on your machine). Windows Setup will guide you through the standard process: language selection, product key entry (you can skip this if you already own Windows and will activate later). The first critical moment in debloating Windows 11 comes when Windows asks for a Microsoft account.
By default, Windows 11 forces you to sign in with a Microsoft account. This connects your machine to Microsoft's servers, enables Copilot deeper into your system, and locks telemetry into place. On older versions of the Windows 11 installation media, you can bypass this. During the setup screen, press Shift+F10 to open a command prompt. Type oobe\bypassnro and press Enter. This command bypasses the forced Microsoft account requirement and allows you to create a local account instead. After running it, the setup wizard will restart and offer you the option to create a local account — take it. This saves you from fighting with Microsoft's account integration later. But if you miss this, or your version of Windows closed that loophole, you can still revert to a local account later on.
That said, the full clean install step is completely optional. You can debloat any version of Windows 11 back into shape. The techniques in this guide work on 23H2, 24H2, and even newer versions. A clean install just means less to remove at the end. But if you're starting from scratch, starting clean is genuinely worth the 30 minutes it takes.
Take Control of Windows Updates
Ask yourself: what genuine OS features are you waiting for? Is it more likely that Microsoft releases some new, must-have feature for Windows, or that they update Calculator with Copilot integration that breaks your system?
Windows 11's update system was designed with the assumption that your machine exists to serve Microsoft, it's update cadence, and its priorities in serving its customers (not Windows users). The solution: security updates enabled, feature updates on your schedule (or never).
Windows 11 doesn't allow you turn off automatic updates... in the graphical user interface. But you can still turn them off. You just need to know where to look. For any version of Windows 11, the registry method works universally. Press Win+R, type regedit, and navigate to:
HKEY_LOCAL_MACHINE\SOFTWARE\Policies\Microsoft\Windows\WindowsUpdate\AUIf the AU folder doesn't exist, create it. Then create two new DWORD values. Right-click in the empty space, select "New" > "DWORD (32-bit) Value", and name them:
- AUOptions — set the value to
2(this changes the behavior to "notify for download and auto install at scheduled time") - NoAutoUpdate — set the value to
1(this fully disables automatic updates)
The result: Windows will stop forcing updates on you. It'll notify you when updates are available, and you can choose when to install them. This is taking control.
If you're on Windows 11 Pro, Group Policy offers a slightly more refined option. Press Win+R, type gpedit.msc, and navigate to:
Computer Configuration → Administrative Templates → Windows Components → Windows UpdateFind the policy "Configure Automatic Updates" and set it to "Notify for download and auto install" (option 3) or disabled entirely. This gives you the same behavior with a cleaner interface.
This just turns off scheduling. If you manually look for updates (which you should do if you want security updates, and you do want security updates) you will get bombarded with feature updates. To avoid this, you can do what is called "version pinning." This does not stop feature updates forever, but it does stop them for as long as your version of Windows 11 is supported with security updates.
To version pin, we need to go back to the same place in the registry. If you're not already there, press Win+R, type regedit, and navigate to:
HKEY_LOCAL_MACHINE\SOFTWARE\Policies\Microsoft\Windows\WindowsUpdateThen create a new DWORD value by right-clicking in the empty space, selecting "New" > "DWORD (32-bit) Value", and name it:
- TargetReleaseVersion — set the value to
1
Then create a new String value by right-clicking in the empty space, selecting "New" > "String Value", and name it:
- TargetReleaseVersionInfo — set the value to
24H2(or whichever version you are targeting)
Now when you manually check for updates in the Windows Settings, you will only get security updates.
Debloat with Chris Titus WinUtil
Windows 11 ships with dozens of things you don't need or want. Removing them one by one is tedious. WinUtil is an open-source GUI that lets you batch-remove bloat, disable telemetry, kill Microsoft Edge for good, and apply a battery of sensible system tweaks in minutes.
Installing it is a single line in PowerShell. Open PowerShell as administrator (right-click the PowerShell icon, select "Run as administrator") and paste:
irm christitus.com/win | iexThis downloads and executes the installer. A colorful window opens with several tabs: Install, Tweaks, Config, Updates.
The Tweaks tab is where you'll spend most of your time. Click it and you'll see several preset profiles. "Desktop" is the sensible starting point for a clean, productive system. Select it, and WinUtil will apply a curated list of improvements: it'll disable Windows Telemetry, disable the DiagTrack service that phones home to Microsoft, remove targeted ads, disable activity history, and strip out a bunch of privacy-invasive background processes. This is the foundation — a Windows installation that stops trying to monitor everything you do.
After applying the Desktop preset, you can add more removals manually. Most of these are safe to remove entirely:
- Cortana — the voice assistant nobody asked for
- Xbox Game Bar — unless you game, this just consumes resources
- Microsoft Teams — the pre-installed trial, not Slack or Discord
- Clipchamp — Microsoft's attempt at a video editor that you probably don't need
- Microsoft News — the news feed in your Start menu
- Get Help — legacy support tool
- Tips — tutorial system
- Copilot — the AI assistant being force-fed to you
- Widgets — another dashboard you didn't ask for
- Dev Home — useful if you're a developer, otherwise noise
- Solitaire and other pre-installed games — unless you actually play them
While you're here, you might as well take a look at the Install tab. It uses winget (Windows' built-in package manager) to batch-install applications you actually want: browsers like Firefox or Chrome, dev tools like VS Code or Git, media players like VLC, and anything else you'd normally hunt down individually. Set up your list of applications once, and WinUtil can install them all in parallel while you're getting your coffee. This transforms a clean install from a tedious 2-hour manual setup process into something you can walk away from.
WinUtil is open-source and maintained on GitHub at github.com/ChrisTitusTech/winutil. The source is public, the tool is trusted by thousands of power users, and it's regularly updated. You can read the code yourself if you're paranoid (a little bit of paranoia is a good thing here).
Fix the UI with StartAllBack
Windows 11's default UI was intentionally oversimplified to appeal to tablet users and casual consumers. The design philosophy was accessibility at the expense of efficiency. That choice was then buried in years of unsolicited news, ads, and other nonsense Microsoft threw in. The result is a busy mess that visibly bogs down your system every time you drop down the start menu.
Add to that, many long-time Windows users were attached to UI elements that Microsoft unceremoniously gutted in Windows 11. The Explorer right-click menu, moveable taskbar, and customizable taskbar icon tray location all come to mind.
StartAllBack is a magical $4.99, one-time purchase that fixes this permanently.
Your Start menu is reclaimed. You can choose Windows 10 style (columnar, customizable tiles), a cleaned-up Windows 11 style that's actually usable, or if you are a person of taste, a Windows 7 style complete with glassy accents. You can also move your start menu from the center of your screen back to the left (or top on a vertical layout) where it belongs.
And it's not just a coat of paint. The start menu you get is just a list of apps and directories on your computer. There are no ads. There are no news articles. There is nothing unsolicited bidding for your attention. It doesn't make your screen stutter; it's quick and buttery smooth.
The taskbar becomes customizable again. You can show window labels, resize icons to your liking, and critically, set the taskbar to "never combine" windows. You can also move the taskbar to any edge of your screen—top, bottom, left, right. I have always been a top-of-the-screen guy. Some people like their taskbars on the side to preserve scarce, precious vertical space. StartAllBack lets you do either without Registry hacks.
The right-click context menu can be fully restored to its former glory. No more ugly padded Windows 11 look and "Show more options" extra click for useful options.
The File Explorer regains the command bar and ribbon, with a properly designed details pane that doesn't take up half your screen showing you unhelpful metadata. Navigation becomes efficient again.
And please don't groan that you have to pay for this: we live in an age where quality software is as rare as it is undervalued. Everything is expected to be free or ad-supported, which means you pay with your attention and your data instead. StartAllBack is made by a developer who created something simple, genuinely useful, and finished. $4.99 is a fair price for a permanent fix to your operating system.
If budget is a genuine constraint, there are free alternatives. ExplorerPatcher is free and community-maintained, with similar functionality. Start11 ($9.99) is another paid option that's solid but pricier (and to be honest, I liked it less when I tried it out in the past). Neither is quite as polished as StartAllBack, and ExplorerPatcher has a history of breaking with major Windows updates. But they exist.
PowerToys: Software From Microsoft That's Actually Good
Here's something remarkable: Microsoft does make tools for power users. They're just not promoted, not included by default, and buried in the Microsoft Store.
PowerToys is a free collection of system utilities that make Windows more powerful. Install it from the Microsoft Store (search "PowerToys" and download it — it's the official one, by Microsoft), and you unlock capabilities that should have been built into Windows 11.
FancyZones is the most immediately useful. It's a window layout manager that lets you define custom zones on your screen, then snap windows into them. This is especially critical if you have an ultrawide monitor—where trying to manage windows without zones is chaos. You can create multiple layouts for different workflows, and switch between them instantly.
You can drag your windows around the screen normally, or hold shift to snap them to your FancyZones grid when you release. This lets you work flexibly when you need to, while keeping your windows in the exact layout you want most of the time.
Here are some practical layout examples:
- Three-column coding layout: Narrow left column for your file explorer/project tree, wide middle column for your code editor, narrow right column for terminal output or reference documentation. Open three windows, hold Shift while dragging each one, and they snap to their zones perfectly. Repeat this exact layout every single day.
- 2/3 + 1/3 media layout: Wide left side for a video timeline or image editor, narrow right side for a preview panel or color picker. Drag your main editing application to the left, drag your reference or auxiliary tool to the right, done.
- Four-zone dashboard layout: Grid your monitor into four equal zones for a monitoring-style setup — system dashboards, API logs, performance metrics, chat all in their own dedicated spaces. Especially useful for DevOps or live operations work.
Each of these is even more versatile than it sounds, too. That's because if you drop a window onto a border between two zones, you can actually make that window take up both zones. On my ultrawide, I use a 4 equal column layout. Each column is generally wide enough for most of my applications, but not infrequently I will want more horizontal space for a 'main' application I am working it. I can quickly snap that application to two zones, doubling the width. You can do this on the left and the right side, creating a traditional 50/50 split of two windows, but you can also make one window centered at 50% width with two smaller windows to either side.|
To use FancyZones: press Win + Shift + `(backtick) to open the zone editor. Or find it from your new-and-improved start menu by searching for PowerToys or FancyZones.
Keyboard Manager is another gem. Windows' keyboard remapping is painful, buried in settings, and poor on features. Keyboard Manager opens up more possibilities. Remap Caps Lock to Ctrl. Remap the right Alt to your preferred shortcut modifier. Create custom shortcuts: press Win + t to run Windows Terminal (more on that later). Or maybe you want a key combination to open a specific project folder. Keyboard Manager lets you do this. For me, Win + c opens my case files folder (instead of opening an Explorer window and navigating manually).
If you want more advanced features, AutoHotKey is even better, but Keyboard Manager bundled with PowerToys should be enough for most use cases.
PowerToys Run (activate with Alt+Space) is a fast launcher that mimics Spotlight on macOS, KRunner on KDE, and Rofi/Wofi for auto-tiling addicts. Type an app name and it appears. Type calc and the calculator launches. Type a file name and it finds it in your file system. Type a math expression and it evaluates it. It's dramatically faster than hunting through the Start menu or using the search function, and it looks clean and beautiful (something that cannot be said for most other Windows software).
Windows Terminal: The Command Line You Actually Want
Here's another thing Microsoft made that people still seem not to know about: Windows Terminal, and it's genuinely excellent.
By default, Windows ships with cmd.exe (the ancient command prompt from the 1990s) and PowerShell (which is vastly better than cmd but frustratingly doesn't even include all of its functionality, so you're sometimes stuck using cmd anyway).
Windows Terminal — available by default on Windows 11 22H2 and later, or installable free from the Microsoft Store — is the upgrade that replaces both.
Windows Terminal gives you tabs, split panes, customizable colors and fonts, and the ability to run multiple shell environments in the same window: PowerShell, cmd.exe, and WSL (Windows Subsystem for Linux). You can have a Linux shell in one tab, PowerShell in another, and an SSH connection to a remote server in a third. Split panes mean you can run a build process in one pane while viewing logs in another, all in the same window, all with unified settings and customization.
Configure it to your preferences (colors, fonts, default shell, startup directory) in the Settings menu. The configuration is clean JSON, so you can hand-edit it if you want granular control. Install it, make it your default terminal, and never go back to cmd.exe. This is what a modern terminal should look like.
Bonus Optimizations: Lightning Round
If WinUtil's Tweaks tab didn't fully disable Copilot (it usually does, but belt-and-suspenders approach is better), you can nuke it from the registry. Press Win+R, type regedit, and navigate to:
HKEY_CURRENT_USER\SOFTWARE\Policies\Windows\WindowsCopilotCreate a new DWORD value called TurnOffWindowsCopilot and set it to 1. This disables it entirely.
The Widgets panel — that sidebar that occasionally appears on the left of your screen with weather and news — can be disabled via Settings > Personalization > Taskbar > Widgets, and toggling it off. You can do the same with Notifications via Settings > Notifications, and toggling it off.
Startup apps often sneak onto your system. Open Task Manager (Ctrl+Shift+Esc), go to the Startup tab, and disable anything you don't need launching at boot. Applications that start silently at startup consume RAM and slow down your login time. Aggressive prune here.
Windhawk is a free collection of additional visual and behavioral mods for Windows 11. It's community-driven and allows you to apply reversible tweaks: swap window buttons to the left side (like macOS), remove the taskbar labels hover delay, adjust the visual style.
Komorebi or GlazeWM are both tiling window managers for Windows written in Rust, if you're into that sort of thing. GlazeWM is more user-friendly, but Komorebi is more performant and customizable.
Enjoy the Zen
After you've done all of this—some of the magic of old Windows returns. You won't be hand editing HTML to customize your MySpace page, but you won't resent having to use your own computer anymore. When you open your start menu, everything there will be yours. The UX you use to navigate your work day in and day out will be clean and beautiful.
Your machine will run faster, drain battery more slowly, look better, and be more of a joy to use. It will stop nagging you about updates and notifications and featured news or sponsored content you never asked for. It will respect your time and, more importantly, the fact that you are the owner of your computer. Not Microsoft.
Member discussion